| Assigned: | TBA |
| Due: | TBA |
• Online PDF: Getting Started with Maya
• Review Chapter 4 NURBS Modeling - Lessons 1, 2, and 3
Turn-in:
• Please turn in your Maya .ma or .mb file for your completed sailboat, as well as a high quality 1024x768 jpg to the location designated by Prof. Olsen.
• Be sure to name your files: "lastname_firstname_projectname".mb or .ma, "lastname_firstname_projectname".jpg
- What to do:
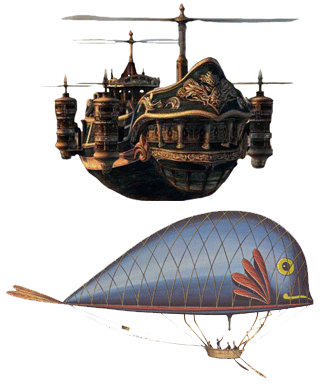
- Model an airship or toy of your own design with NURBS surfaces.
- Before you begin on Wednesday you need to have sketches of your model completed. You will need these to reference before you start.
- For full credit, flying boats or toys(use the same amount of components) should include:
• hull
• deck
• cabin
• mast/boom
• sails/propellors
• cockpit
• additional details
- Tools and Techniques:
Hull Create the hull of your boat starting with a curve for the initial shape. Duplicate/revolve this curve to plan out the shape of one side of the hull. Loft across these curves to create your NURBS surface, and then mirror it across to complete the other side.
Create > CV curve tool
Surfaces > Loft
Edit > Duplicate (Instance vs. Copy)
Edit NURBS > Attach SurfaceDeck Create the deck by selecting the isoparms at the top of the hull and lofting across.
Right Mouse > Isoparms
Surfaces > LoftCabin Create > CV curve tool (for profile of cabin)
Select cabin curves
Surfaces > Planar
Move surface and curves into position as side of cabin (Make sure there is NO history. Delete or create without history).
Select cabin edge curves
Surfaces > Loft
Select cabin window curves
Surfaces > Extrude (set option for distance, and define proper orientation/depth)Mast/Boom Create > CV curve tool (for mast cross-section and mast profile)
Surfaces > Extrude (set option for tube, and define proper secondary options)
Create > NURBS Primitives > Cylinders (position into proper locations as masts)Sail/Propellors Right Mouse over mast and select isoparms
Edit Curves > Duplicate Surface Curves
Create > CV Curve (snap new curves to complete outer edge of sail)
Surface > Boundary
Repeat for additional sailsCockpit Create > CV curve tool (for compartment profile)
Select curve
Edit > Duplicate
Move duplicated curve into position
Select compartment isoparms and loft surfaces
Edit NURBS > Trim tool (to create holes for windows)Details Include additional details to show off your creativity!
- Tips:
• Be sure to start early so you can bring your questions and problems to office hours.
• Name your components as soon as you create them. It'll be much easier than changing them all later. Make sure the names you choose are simple and easy to type. When you need to pick one little part of a complex model, it is MUCH easier to pick it by name than with the mouse.
• Take the time to learn the keyboard shortcuts (especially for transforming the camera), the marking menus, and how to customize your workspace.
• Last but not least - save EARLY and save OFTEN!
• For reference look up images of Airships on Getty-images.com, Final Fantasy, Hayao Miyazaki........ Be as creative as you want!